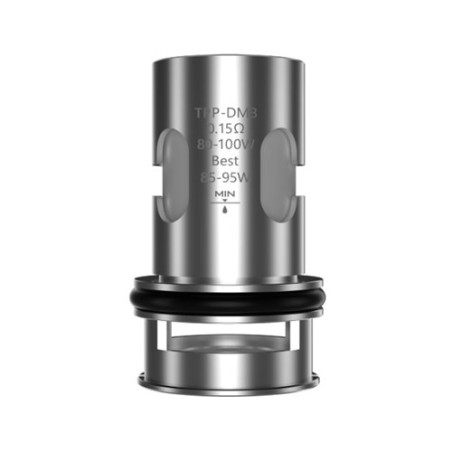
Turn off the e-cigarette, disconnect the charging cable and let a warm tank or coil cool down. Remove the old coil and install a new one that fits the tank or pod. The new coil’s cotton must be thoroughly moistened with e-liquid before heating. On a pod with a fixed coil, the entire pod is replaced.
The first coil change can be difficult to understand because designs vary. Below are two examples: an integrated reservoir in the Joyetech eGo AIO Anniversary Edition and a separate ELLO tank on the Eleaf iStick Pico25.
How do I change the coil in a Joyetech eGo AIO?
On the eGo AIO Anniversary Edition, the coil head is threaded into the top cap’s airflow tube. The reservoir is built into the device: AIO stands for “All in One”. The coil is therefore removed with the top cap, not through a separate tank base.
The image and diagram illustrate the parts of the AIO design:

- Press down the childproof top cap and unscrew it.
- Unscrew the old coil head from the airflow tube in the top cap.
- Empty any remaining liquid if you are going to clean the reservoir. Wipe away accessible liquid residue and keep buttons, contacts and the charging port dry. Do not rinse the entire AIO device or place it in water. The coil head should not be washed with water.
- Moisten the new coil’s cotton with a few drops of e-liquid before first use, according to the model’s manual.
- Screw the compatible coil into the top cap’s airflow tube. Fill the reservoir without exceeding the maximum mark, replace the top cap and close it.
Do not prime a dry coil by activating it. The cotton must be allowed to absorb liquid before the heating element is used.
How do I change the coil in an ELLO tank on an iStick Pico25?
On the ELLO, the coil is located on the tank base. The iStick Pico25 is the battery mod that the tank is screwed onto; it is the tank’s design that determines how the coil is changed. This example applies to the combination with the ELLO, not every tank that can be mounted on the mod.

The following replacement steps use the ELLO tank’s complete disassembly and reassembly:
- Remove the cooled tank from the switched-off mod and empty any remaining liquid.
- Unscrew the top cap with the mouthpiece and lift off the glass tube so that the base with the coil head is accessible.
- Unscrew the old HW coil from the base. Moisten the new compatible coil’s cotton with a few drops of e-liquid and screw the coil into the base.
- Replace the glass tube on the base’s seal and screw the top cap back on. The O-rings should sit correctly without being pinched; they do not need to be removed just because the coil is being replaced.
- Slide the top cap with the mouthpiece backwards to open the filling port. Fill through the port without overfilling and slide the top cap back. On the ELLO version with a child lock, press the button while sliding the top cap.
Allow the new coil’s cotton to become thoroughly moistened before using the tank.
How do I install the coil without damaging threads or seals?
Place a threaded coil straight against its fitting and screw it in carefully. If it immediately sticks or becomes misaligned, loosen it and start again. Do not force a cross-threaded coil into place. Incorrect installation can cause leaks.
Glass, top caps and O-rings do not need to be disassembled in the same way in all tanks. The O-rings seal between the parts and should sit in their intended positions without damage. Do not use cracked glass or damaged seals. Replace removed parts in the correct order and seal the tank before use. On a pod with a fixed coil, the sealed construction should not be opened to replace the coil.
When does the coil need to be replaced?
Replace a damaged or worn coil. Stop using it if there is a burnt taste; burnt cotton cannot be repaired with more liquid or tank cleaning. Reduced or changed flavour can also be caused by residue and wear, but this alone does not show that the cotton is burnt.
How long the coil lasts depends on wattage, liquid supply, the ingredients in the liquid and the amount of use.
Leaks do not automatically mean that the coil must be replaced. Overfilling, incorrect installation and damaged seals can also cause leaks. Stop using the device, wipe up the spill and correct incorrect installation, the fill level or damaged seals before continuing to use it. Do not use or charge the device if liquid has entered the electronics.
How do I prepare the new coil?
Allow the cotton to absorb e-liquid before the coil is heated. This is called priming. On accessible cotton, liquid can be added before installation; after filling, allow time for the liquid to be absorbed into the rest of the wick.
For the eGo AIO Anniversary, the manual specifies adding a few drops of e-liquid to the new coil’s cotton before first use. Do not use a new coil dry and do not activate the device while the coil or tank is disassembled.
More preventive advice is available in our guide on coil care and priming. Removable, washable tank parts should be cleaned without the coil and electronics and must dry completely before installation. The guide on cleaning the liquid reservoir describes which parts should be kept away from water, including the battery unit and coil head with cotton.
What is a coil and what does ohm mean?
A coil is the e-cigarette’s electrical heating element. A replaceable coil head also contains an absorbent material, often cotton, which feeds liquid to the heating element. Heating produces an aerosol that passes through the mouthpiece and carries the liquid’s flavour compounds.
The coil is also called an atomizer. The terms burner and incinerator are used, but the intended function is to heat liquid. Dry cotton can, however, burn. Coils vary in design, materials and resistance; they do not all have the same properties.
Ohm, represented by the symbol Ω, indicates electrical resistance. Different ohm values can provide different usage characteristics, but the coil must also be compatible with the tank or pod and used within its wattage range. The ohm value alone does not determine which coils fit.
For help with your device, you can contact our customer service at support@cigge.se. State the model of the device and the tank or pod.
Quick Facts
- Reading Time
- 6 min
- Popularity
- Very Popular
- Category
- Troubleshooting & maintenance
- Published
- 2019-08-22
Related Products
Products mentioned in this article