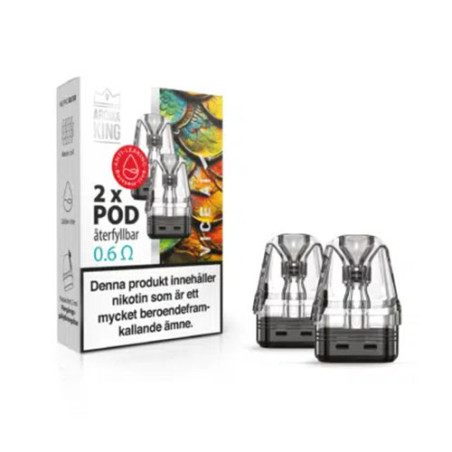
A removable, disassemblable vape tank is cleaned by removing the coil and rinsing the washable parts in warm water. The parts must be completely dry before the tank is reassembled. The coil, battery and electronics should not be washed.
Which parts of a vape tank can be washed?
Loose tank parts without electronics can be rinsed when they are intended to be cleaned with water. This includes, for example, a removable tank glass. Remove the coil first: its cotton should not be washed as a tank part.
An e-liquid reservoir that is attached to the electronics must be handled differently. On the Aspire Breeze, the reservoir is built into the device itself and is wiped with paper. The removable chimney can be rinsed after the coil has been removed, but the entire device should not be rinsed.
How do you clean a disassemblable tank?
Remove the tank from the battery section, take out the coil and clean the washable parts separately. This allows you to reach old e-juice in gaps and around the tank’s base.

- Turn off the device and remove the tank. Empty any remaining e-juice.
- Disassemble the parts intended to be taken apart and remove the coil. Keep track of the seals and how the parts were assembled.
- Rinse the washable parts in warm water. Wipe away residue with a soft cloth or paper. A cotton swab can be used carefully in accessible gaps, but it should not be pushed into the coil or electronics.
- Rinse away any remaining e-juice and cleaning agent. Dry the parts and let them air-dry completely before reassembling them.
Clean the tank when there is residue in it and when changing e-juice if you want to remove liquid from the previous flavor.
Can you use dish soap, alcohol or vodka?
A small amount of mild dish soap can be used on washable, loose tank parts. Rinse thoroughly afterward so that no dish soap residue remains. Alcohol is not suitable for all materials.
Innokin describes unflavored vodka as an option for loose glass and stainless-steel parts. This advice does not apply to a complete tank with a coil and seals or to a device with electronics. Remove the O-rings and rinse them separately in warm water. Do not use solvents on plastic or polycarbonate; alcohol can damage certain plastic materials.
Wipe away e-juice residue with a soft cloth or paper and then rinse the treated glass or steel parts in warm water. Let them become completely dry before assembly.
How do you dry the tank after cleaning?
Dry the loose parts with paper and then let them air-dry until they are completely dry. Pay particular attention to the tank’s base, gaps and areas where the seals are located, as water may remain there.

Do not reassemble the parts while they are still damp. Avoid strong heat that could damage plastic or seals.
Why does the old flavor remain after washing?
The flavor may remain in the coil’s cotton even when the tank parts are clean. After, for example, a tobacco or licorice flavor, the previous flavor may therefore be noticeable in the next e-juice.
If cleaning the tank is not enough, the coil may need to be replaced. A burnt cotton wick cannot be restored by washing the tank. On a pod with a fixed coil, the entire pod is replaced. Read more about burnt taste and how to avoid burnt coils.
How do you remove e-juice and fingerprints from the e-cigarette?
Wipe the outside of the device with dry, soft paper or a soft cloth instead of wet paper. Use a dry polishing cloth for fingerprints on the display. The battery section should not be rinsed or placed in water.
Wipe up spills, especially around the tank connection. Keep liquid away from buttons, the charging port and batteries.
What do you do if liquid has entered the device?
Stop using the device if you suspect that e-juice has entered the electronics, if the activation button stops working or becomes stuck, or if the device activates by itself. Do not charge it or try activating it to see if it works.
Liquid can damage electronics and activation sensors. Replacing the coil will not fix faults in the electronics. Also see our guide on problems with vape batteries.
Quick Facts
- Reading Time
- 4 min
- Popularity
- Very Popular
- Category
- Troubleshooting & maintenance
- Published
- 2018-06-12
Related Products
Products mentioned in this article